Outdoor
Building Stone Walls
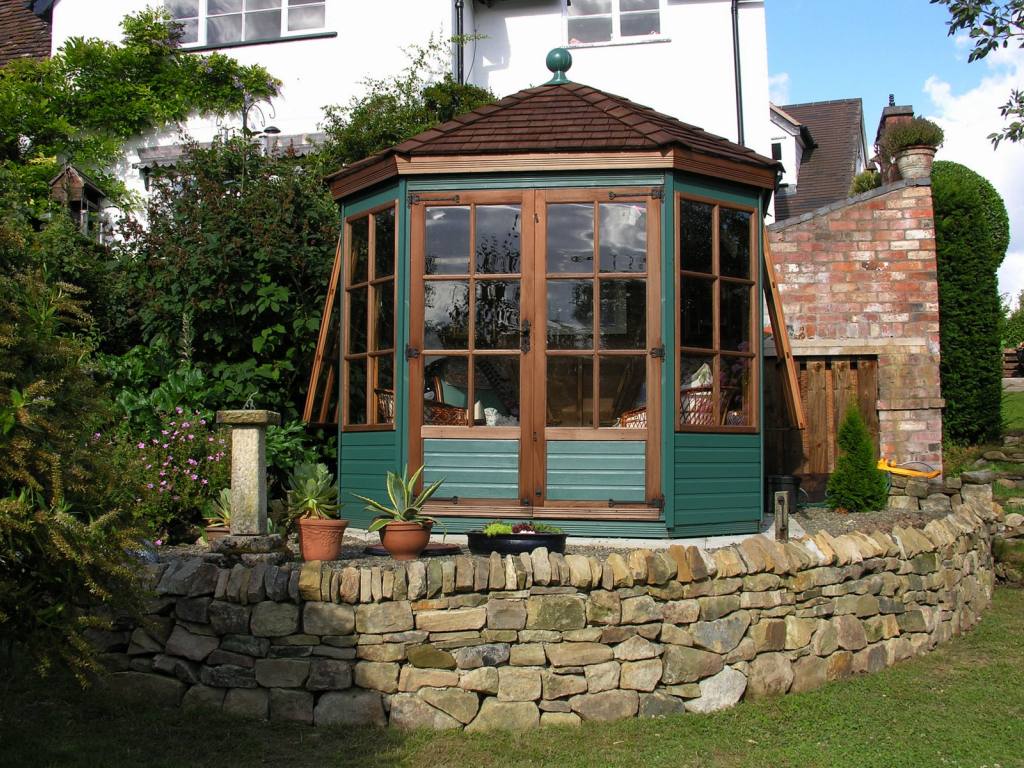
There are lots of summer projects available for the gardening enthusiast. You’re probably harvesting summer vegetables and enjoying fresh flowers indoors, but this is the time when I start thinking about fall planting. There are many ways of creating new usable space in your yard, but I think one of the most attractive and enduring methods is to create new beds by constructing walls.
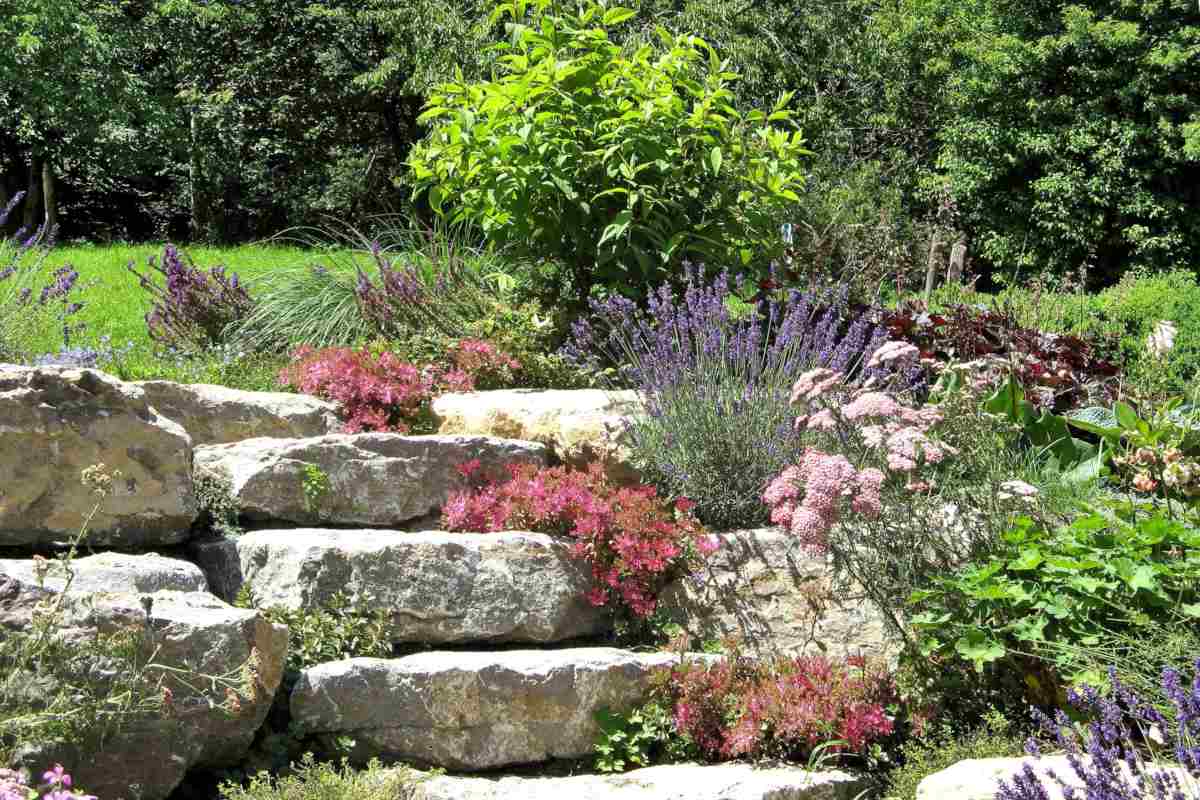
Timbers are a good medium for defining space, but I am partial to stone walls. I have an aversion to placing walls where no wall is needed, but walls are great for terracing a hilly backyard, raising a bed around the foundation of your home, leveling ground where it’s a little too steep or extending the size of an existing bed.
Construction of new homes today frequently raises foundations slightly from ground level to aid runoff. The slope away from the side of the foundation is sometimes too steep to use as a planting area. This is the perfect spot for a wall.
Building walls is not a difficult task, but it does take some time and planning. The process is the same whether you are extending a bed around the foundation of our house or terracing your steep backyard with a series of walls.
The amount of stone you’ll need naturally depends on the size of the wall you are planning to build. For sake of example, you should know that with approximately 1 ton of stone, you can build a wall 1-foot high and between 14-20 feet long.
Simply, the stones should be stacked like bricks – overlapping each other so that there are no vertical seams. Stones should be as flat as possible and 2 inches to 4 inches thick. Even though you are going to look at the edge of the piece, it should be 12 x12 to 12 x 18 inch flat surface so it is heavy enough to stay in place. When building a dry-laid stone wall, never go higher than 36 inches. Once you reach that height, step back into the hillside about three feet and go up again.
When you build the wall, you need to remember several things about soil and water. During the winter, moisture in the soil will expand when it freezes. Therefore, you must use several techniques to avoid the soil’s ability to push the stones out and ruin the wall.
A wall should be tiled. Starting slightly below grade level behind the wall, install a perforated tile that will allow for automatic removal of excess water. In addition, gravel should be used behind all walls to aid in water removal. I’ve seen walls that lasted 30 years and I’ve also seen walls that have fallen in three. So, don’t cut corners on this step.
Start the wall by removing the sod. The first layer of stone should be 1 to 2 courses below grade level. The stone should not be laid absolutely flat, but should be “dipped” slightly, tilting back into the soil. That way gravity helps hold the stone in place. In order to move the stone, the earth would have to push out, up and over at the same time.
Now it’s time for the second layer. In addition to dipping the layer of stone back slightly, there is one other technique you should use to keep your wall in place. Instead of placing the second layer flush with the first layer, it should be back from the front edge slightly, approximately one-fourth inch. Each additional layer should be moved back slightly as well. This is called battering and it’s one more assurance that your wall will last. (Dipping and battering – almost sounds like we’re deep-frying fish, but fishing is my other favorite summer project!)
Here are a few more tips: with a taller wall, you want to use stone up to 4 inches think. A shorter wall is fine with thinner stone, 2 inches to 4 inches; and smaller walls used more for their decorative quality are great for very thin stone – only 1 to 2 inches. With any wall, use the thicker stone on the bottom, thinner stone on top. It’s not a physical requirement – it’s just aesthetically pleasing.
There are a variety of stones and colors from which to choose. Talk with a stone supplier, letting him or her know what you have in mind and emphasizing longevity. After investing your time and money in a wall, you don’t want to have to re-build it. Also, when the stone is delivered, make certain you ask your supplier to dump the stone on your lawn, not your driveway. I’ve seen lots of stone get broken needlessly when it was dumped on a drive (it’s also hard on the driveway) and it may be several days before the driveway could be used.
You can create a beautiful usable space in your landscape with stone walls. It’s a rewarding project that will look good for years.
Outdoor
The Rise of Glamping: Luxury in the Wild
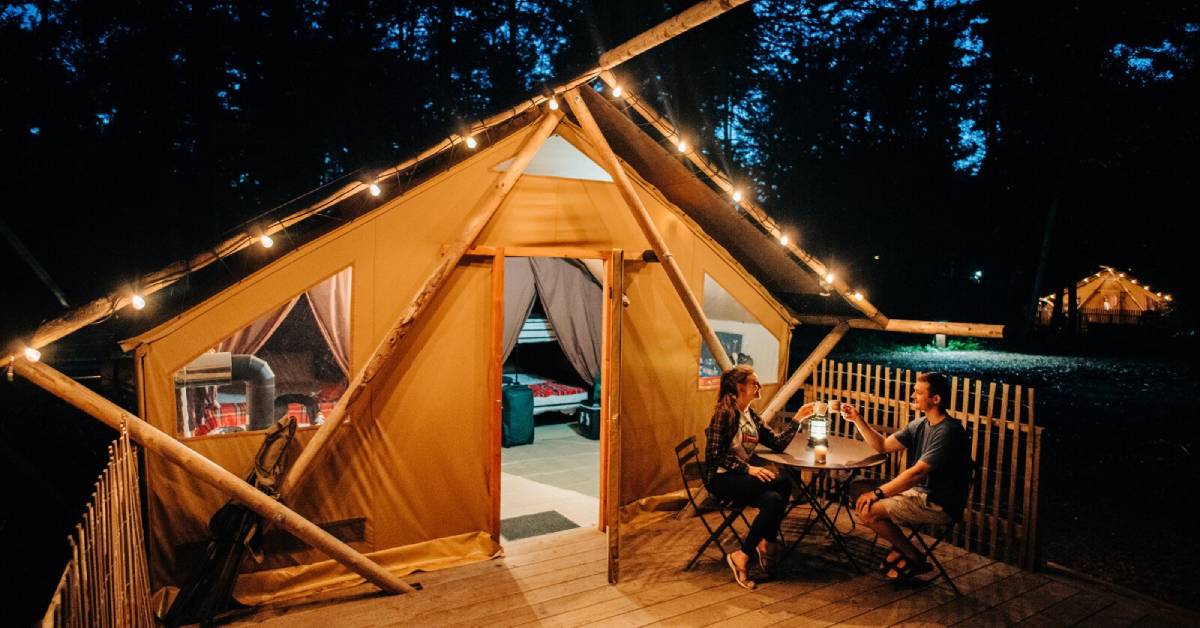
Gone are the days when enjoying nature meant roughing it with minimal comfort. Enter glamping, a luxurious twist on traditional camping that combines the beauty of the outdoors with the comfort of modern amenities. From cozy safari tents with plush beds to treehouses equipped with Wi-Fi and gourmet meals, glamping offers an elevated experience for those who crave adventure without sacrificing convenience. This trend has exploded in popularity in recent years, attracting everyone from families to honeymooners looking for a unique escape. By combining the peace of nature with boutique-hotel comfort, glamping represents the best of both worlds, involving travelers in the wild while keeping them pampered.
What Is Glamping and How Did It Start?
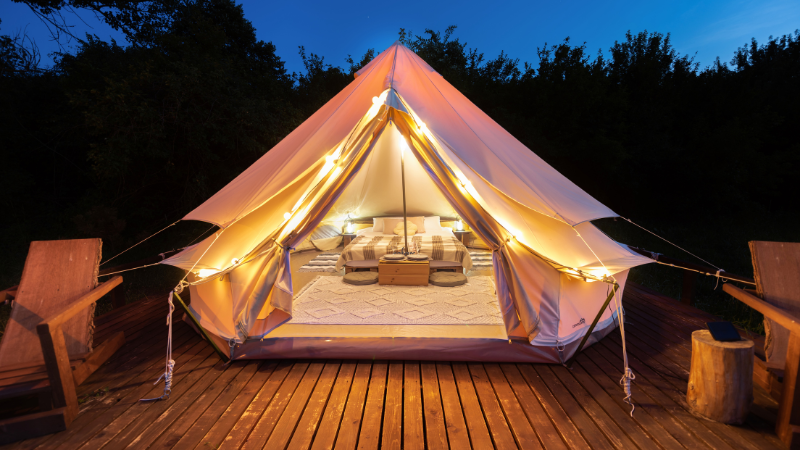
Glamping, short for “glamorous camping,” combines the beauty of outdoor adventure with the comforts of luxury accommodations. Unlike traditional camping, where travelers sleep in tents with minimal amenities, glamping offers unique stays such as safari tents, yurts, treehouses, and even domes equipped with cozy beds, electricity, and private bathrooms. This trend originated in the early 2000s as a response to travelers seeking interesting nature experiences without sacrificing comfort. However, its roots can be traced back even further to the lavish camping expeditions of European and African aristocrats in the 19th and early 20th centuries. Today, glamping has evolved into a mainstream travel option, mixing sustainability, style, and convenience. Whether nestled in a remote forest or perched on a scenic mountainside, glamping provides a perfect balance between adventure and indulgence, making it an appealing choice for modern explorers.
Popular Types of Glamping Experiences Around the World
Glamping comes in many unique forms, offering travelers a variety of ways to experience nature in style. Safari tents in Africa provide a luxurious twist on classic wildlife adventures, complete with plush beds, private decks, and stunning views of the savannah. In Europe, travelers can stay in historic yurts, converted barns, or even medieval-style tents for a cultural spin on outdoor living. North America is home to cozy treehouses, A-frame cabins, and sleek geodesic domes that combine modern design with rustic surroundings. For those seeking a seaside escape, luxury beachside glamping pods and overwater bungalows combine ocean views with high-end amenities. Even in remote destinations like Iceland, heated glass igloos allow guests to watch the Northern Lights from the comfort of a warm bed. With so many options available worldwide, glamping caters to every taste, from adventure seekers to those craving tranquil, scenic retreats.
Tips for Making the Most of Your Glamping Trip
To get the best experience from your glamping trip, plan ahead and choose a location that matches your interests—whether it’s a mountain retreat, forest hideaway, or beachfront escape. Check what amenities are included so you can pack accordingly, bringing only essentials like layered clothing, comfortable shoes, and personal items. Arrive early to familiarize yourself with the surroundings and make the most of on-site activities such as hiking, kayaking, or stargazing. While glamping offers luxury, it’s still an opportunity to disconnect from everyday life, so limit screen time and embrace the natural setting. Don’t forget to pack small comforts like a favorite book, snacks, or a journal to improve your downtime. Finally, respect the environment and follow sustainable practices, such as minimizing waste and leaving no trace. With thoughtful preparation, you’ll enjoy a memorable and stress-free escape that blends adventure with comfort.
Conclusion
Glamping combines the beauty of nature with the comforts of luxury, creating an unforgettable way to travel. By choosing the right destination, preparing thoughtfully, and embracing the experience, you can enjoy the perfect balance of adventure and relaxation while making lasting memories in some of the world’s most stunning settings.
Outdoor
How to Support Your Body’s Healing Process Naturally

The human body is a remarkable self-repairing system, capable of healing wounds, regenerating tissues, and restoring balance after illness or injury. However, the speed and quality of recovery depend on multiple factors, including nutrition, lifestyle choices, and targeted interventions that promote optimal cell function. By understanding and supporting these processes, you can help your body heal faster, more efficiently, and with fewer complications.
One area of interest in modern recovery science involves nutritional supplementation and peptide therapy. For example, some researchers have explored the role of regenerative peptides, such as BPC-157, in enhancing the body’s natural repair mechanisms. For those interested in dosage information, a bpc 157 dosage chart can provide structured guidance on experimental protocols in a research setting. While more studies are needed to confirm long-term safety and efficacy, this is an area of growing curiosity among athletes, biohackers, and wellness enthusiasts.
1. Nourish Your Body with Healing Foods
Nutrition is one of the most critical factors in the healing process. After injury or illness, your body’s demand for specific nutrients increases to repair tissues and reduce inflammation. Focus on:
-
Protein-rich foods like lean meats, eggs, legumes, and fish, which supply amino acids for rebuilding muscle and connective tissue.
-
Vitamin C sources such as citrus fruits, bell peppers, and strawberries, essential for collagen production and immune function.
-
Omega-3 fatty acids from salmon, walnuts, and chia seeds to reduce inflammation and promote cell membrane health.
-
Zinc from nuts, seeds, and shellfish, which aids wound healing and immune response.
Avoid excessive sugar and processed foods, as they can increase inflammation and slow down recovery.
2. Stay Active — but Don’t Overdo It
Movement stimulates blood flow, which brings oxygen and nutrients to healing tissues. However, overexertion can cause setbacks. Gentle activities like walking, stretching, or swimming can maintain circulation without stressing injured areas. If you’re recovering from a musculoskeletal injury, follow your healthcare provider’s recommendations for activity progression.
3. Prioritize Rest and Sleep
Healing occurs most effectively during deep rest. While you sleep, your body releases growth hormone, repairs damaged cells, and reduces inflammation. Aim for 7–9 hours of quality sleep each night and consider short naps during the day if your body feels fatigued. Creating a calming bedtime routine—limiting screen time, lowering lights, and practicing relaxation techniques—can improve sleep quality.

4. Manage Stress Levels
Chronic stress raises cortisol levels, which can slow down the healing process and suppress immune function. Incorporate stress-reducing practices such as meditation, deep breathing, yoga, or spending time in nature. Even a few minutes of mindfulness daily can make a measurable difference in your recovery.
5. Stay Hydrated
Water is essential for transporting nutrients, flushing toxins, and maintaining healthy tissue function. Mild dehydration can slow healing by reducing blood flow and oxygen delivery to injured areas. Aim to drink water consistently throughout the day, adjusting for activity level and climate.
6. Support Your Gut Health
Your gut microbiome plays a role in inflammation control and immune response. Consuming probiotic-rich foods like yogurt, kefir, sauerkraut, or kimchi can promote a balanced microbiome. Prebiotic fibers from foods like garlic, onions, and bananas feed beneficial gut bacteria, further supporting overall health.
7. Consider Natural Anti-Inflammatory Support
Certain herbs and compounds have been studied for their anti-inflammatory properties, including:
-
Turmeric (curcumin) — May reduce pain and inflammation in joints and tissues.
-
Ginger — Known for its antioxidant and anti-inflammatory effects.
-
Boswellia serrata — Traditionally used to manage inflammation and support joint health.
Always consult with a healthcare professional before adding supplements, especially if you are taking medications or have underlying conditions.
8. Harness the Power of Regenerative Therapies
Emerging research in regenerative medicine focuses on supporting the body’s own healing mechanisms. This includes modalities like cold therapy, red light therapy, and, in experimental settings, the use of bioactive compounds like peptides. While these are not substitutes for medical care, they may complement traditional recovery strategies under professional supervision.
9. Avoid Re-Injury
Once you start feeling better, it’s tempting to resume normal activities immediately—but doing so too soon can undo progress. Gradual reintroduction of physical demands, combined with continued support through proper nutrition and rest, helps prevent setbacks.
10. Work with Your Body, Not Against It
Healing is a biological process that takes time. Listening to your body’s signals—such as fatigue, soreness, or swelling—is crucial. Pushing through pain may cause more damage, while respecting recovery phases promotes long-term health and function.
Final Thoughts
Supporting your body’s healing process naturally is about more than just waiting for time to pass. It requires a balanced approach that combines nutrient-rich foods, restorative sleep, gentle activity, and stress management. By adopting these practices and staying informed about emerging research—such as the potential role of regenerative peptides—you can create an environment where your body thrives and recovers more effectively.
Outdoor
Top Landscaping Ideas to Enhance Your Backyard
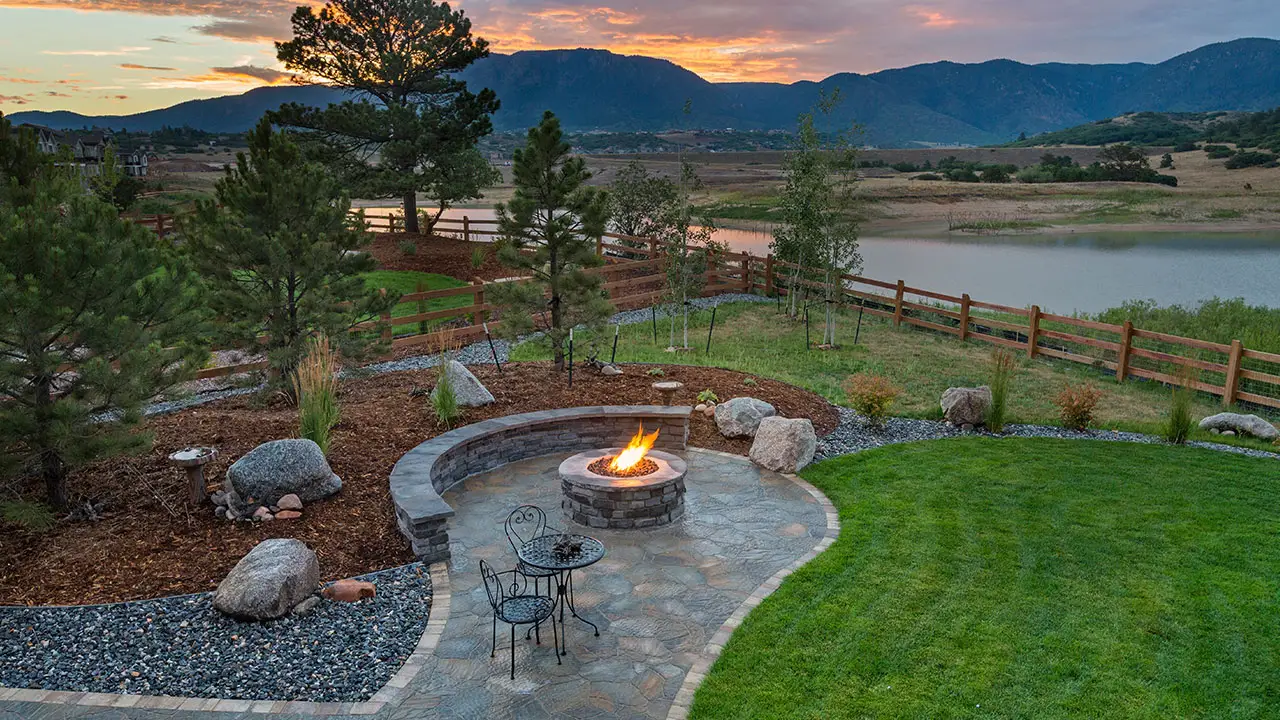
Your backyard is more than just an outdoor space; it’s an extension of your home and a blank canvas for creativity. Whether you dream of a serene retreat, a lively entertainment hub, or a lush garden oasis, the right landscaping ideas can transform your yard into something truly special. From simple upgrades like adding vibrant plants and cozy seating to major changes involving pathways and water features, or even building stone walls to add structure and charm, there’s no shortage of inspiration. This guide will explore top landscaping ideas to help you improve your backyard’s beauty and functionality. Get ready to unlock your outdoor space’s full potential and create a place you’ll love to spend time in!

Creating a Serene Outdoor Retreat with Simple Landscaping Changes
Transforming your backyard into a serene escape doesn’t require grand renovations. Start with plants that promote calm, like ferns, lavender, or ornamental grasses. Arrange them thoughtfully to create natural borders or a layered look for a lush, tranquil atmosphere.
Next, focus on seating. Choose cozy options like cushioned chairs, hanging hammocks, or a simple wooden bench. Position them in shaded areas or spots with a clear view to encourage relaxation.
Lighting is key to setting a peaceful mood, especially in the evening. String fairy lights, hang lanterns, or add solar-powered path lights for a soft, warm glow. These small changes instantly elevate any outdoor space.
Finally, bring in soothing decor. Water features, like a small fountain or birdbath, add gentle sounds. Throw pillows, neutral outdoor rugs, and minimal accents like candles create an inviting yet uncluttered ambiance.
By keeping the design simple and intentional, you’ll create a backyard retreat you’ll love to unwind in after a busy day.
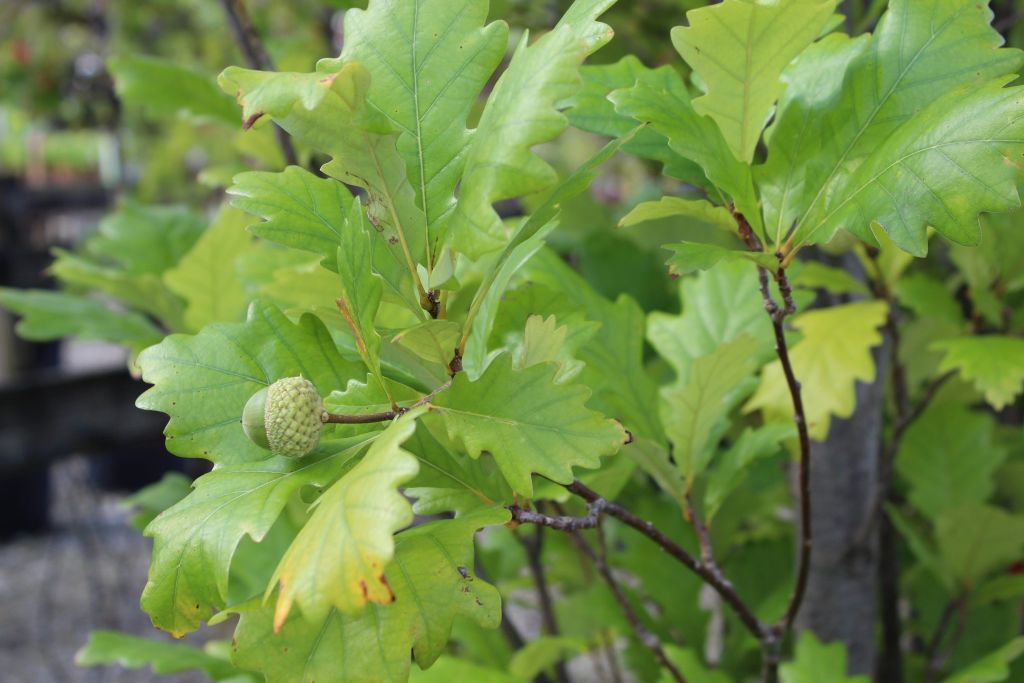
Adding Height and Texture with Trees, Shrubs, and Trellises
Adding height and texture to your backyard design can instantly make it feel more dynamic and visually appealing. Start with trees to establish vertical interest. Opt for smaller varieties like Japanese maples or flowering dogwoods if space is limited. These not only draw the eye upward but also provide shade and seasonal color.
Shrubs are perfect for filling spaces and adding layers. Use hedges to define borders, or choose ornamental shrubs, like hydrangeas or boxwoods, for texture and visual depth. For a natural look, mix shrubs of differing heights to create a lush, tiered effect.
Trellises are fantastic for vertical growth and charm. Use them to support climbing plants like jasmine, wisteria, or even vegetables such as beans. Position trellises against walls, as standalone features, or to frame pathways.
When combined, trees, shrubs, and trellises can redefine your backyard, creating cozy nooks, structured spaces, and eye-catching focal points. With creative choices, these elements enhance functionality and style, making your outdoor area feel complete.
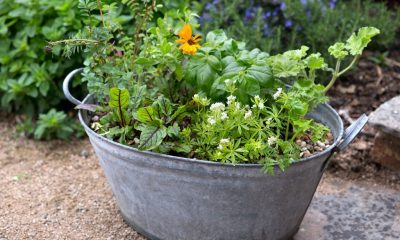
Maximizing Small Backyards with Smart Landscaping Tips
A small backyard can feel expansive with the right landscaping strategies. Start by using vertical spaces to your advantage. Install wall planters, hanging baskets, or trellises with climbing plants to add greenery without sacrificing floor space.
Also try multi-functional furniture, like benches with built-in storage or foldable tables, to make the area both practical and stylish. Zone your backyard creatively by using rugs, potted plants, or small dividers to define spaces, such as a seating area and a green corner.
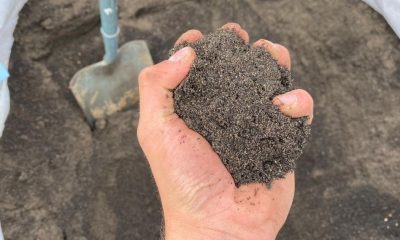
Choose compact or dwarf plant varieties that thrive in smaller settings while still adding vibrant color and texture. Raised garden beds or tiered planters can also maximize planting potential in limited square footage.
To create a sense of openness, stick to a compatible color palette and arrange paths or furniture in diagonal lines to give the illusion of depth. Mirrors and reflective materials can also amplify the feeling of space.
With smart design and functionality in mind, even the tiniest backyard can become a beautiful, versatile retreat.
Conclusion
Transforming your backyard is simpler than you think. With the right landscaping ideas, any outdoor space can become a stunning sanctuary. From cozy retreats to vibrant gardens, the possibilities are endless. Get creative, take the first step, and start building the backyard you’ve always dreamed of. For more inspiration, explore our full range of outdoor pages to help you turn every corner of your yard into something special. Your oasis awaits!

Exercise and Supplements for a Better Lifestyle

Seasonal Eating: What to Cook in Spring, Summer, Fall, and Winter

The Rise of Glamping: Luxury in the Wild

Fall is the Best Time To Plant Shade Trees

Cooking for Special Diets
The Regal Prince Oak: A Superior Columnar Choice
-
 Gardening2 years ago
Fall is the Best Time To Plant Shade Trees
-
 Food and Cooking2 years ago
Cooking for Special Diets
-
Gardening2 years ago
The Regal Prince Oak: A Superior Columnar Choice
-

 Food and Cooking2 years ago
The Allure of Korean Evodia: A Gardener’s Delight
-

 Food and Cooking2 years ago
Journey Through Global Flavors
-
 Gardening2 years ago
Guide to Growing and Enjoying Herb Gardens: History, Cultivation, and Practical Tips
-

 Gardening2 years ago
Top 4 Products For Your Home Garden
-
 Gardening2 years ago
Top Dressing Your Lawn: How to Level Uneven Terrain